Todd Myers, Pennsylvania State University
Problem
Protecting telecommunications cabling under raised floors by placing it in cable trays may not completely solve your cable-pulling and interference problems. If the cable tray is installed on the floor slab, electrical cables can be run across the top of it, possibly leading to electromagnetic interference from the high-voltage cables. Also, the electrical cables may become entangled with the low-voltage cables, causing cable-pulling problems later.
Solution
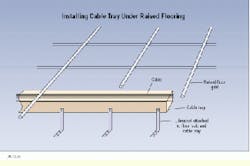
If you install supports that lift the cable tray off the floor slab, other building trades will have easy access to the space beneath to run their cables, minimizing interference and entanglement. Another benefit is that such a system appears neater, making it more aesthetically pleasing to the customer.
Procedure
1) Make sure you have adequate clearance under the raised floor to lift and secure the cable tray system at the height desired. Ensure that you have a clear route for the cable tray to run above all cabling and conduits already installed in the floor.
2) Remove the appropriate crossmembers of the raised floor to insert the cable tray, if necessary.
3) Use L-type brackets or other hardware to support the cable-tray system above the slab. Check with the manufacturer of the cable tray to see if L-brackets or other accessories are available for the system; if not, use general-purpose hardware.
4) Mount the L-brackets to the floor slab by drilling holes for bolts or using a fastening gun.
5) Attach the cable tray to the L-brackets.
6) Pull your cable through the cable-tray system.
7) Replace all crossmembers and floor tiles.
It is good practice to leave a pull string in place after pulling cable through the cable-tray system, because it will save you time with future cable pulls.
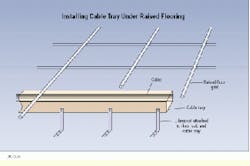
Secure L-type brackets to the floor slab and attach cable tray to the brackets, so that the cable-tray system is lifted and supported above other underfloor utilities.
Todd Myers is a telecommunications coordinator at Pennsylvania State University (University Park, PA). This tip was submitted for the Installer Tips Contest at Cabling Installation Expo `96, held in Charlotte, NC, last October and was developed for publication by Dennis Mazaris, registered communications distribution designer (rcdd), and principal consultant for PerfectSite, 100 Glenn Drive, Suite A-11, Sterling, VA 21064, tel: (703) 450-8986, fax: (703) 450-9343, e-mail: [email protected].

