How to choose the perfect network enclosure
Size matters, and so do security, durability, and accessibility concerns.
If you install the first network enclosure you find, you may be housing your installation's most valuable asset-its servers-in nothing more than a glorified cookie tin. Instead, by following a checklist of priorities, you can choose an enclosure that not only satisfies your installation priorities (including security, durability, compatibility and accessibility) but also matches your budget requirements.
You first priority should be security. Housing mission-critical IT equipment in a locked enclosure eases the burden of responsibility felt by network managers and still lets them provide access to a hand-picked few. Look for enclosures that use a common key to lock front and rear doors as well as side panels.
Physical requirements
Next, list all of the equipment that will be mounted in the enclosure and their complete measurements: height, depth, width and weight.
The combined height will ultimately determine how much equipment you can mount in an enclosure. Taller enclosures, obviously, let you mount more equipment in less floor space.
But filling an enclosure to the top isn't the only consideration, because you may still find plenty of usable space in the rear. That's why measuring equipment depth is important. You can mount more equipment than you think by choosing a deeper enclosure that lets you mount two pieces of equipment, back-to-back. You essentially create two banks of equipment-one accessible through the enclosure's front door and one accessible through the rear door. The enclosure should also feature adjustable vertical rack rails that will support the various depths of all of your equipment as well as let you recess equipment.
After calculating the total vertical rack space (measured in "U", or 1.75 inches), consider growing room. You don't want to pack the rack and then realize that more equipment may be added soon. Extra equipment has a way of appearing once the enclosure is bought and in-stalled. So, as a general rule, leave 20% to 30% of the enclosure's vertical space for system expansion. The space will also provide improved ventilation around mounted equipment so that you won't have to install an exhaust fan.
Width is not an issue with rack-mount equipment, which are designed to fit enclosures. But width is important when mounting non-rackmountable servers and peripherals.
Since the weight of your equipment will quickly add up, choose an enclosure with a high load rating-around 1,500 lbs.-indicating a well-constructed, durable enclosure. Within the enclosure, weight will also determine whether you choose standard or heavy-duty versions of slide-out shelves and other accessories.
Choose an enclosure that is 100% compatible with all servers and meets or exceeds third-party rack requirements of all original equipment manufacturers (OEMs). If you expect to mount tower or desktop equipment, slide-out shelves and mounting accessories may be required.
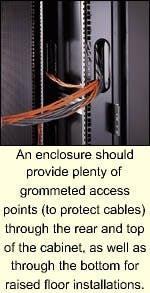
Consider the network, telecom and power cables involved in the installation. You may need to purchase hook-and-loop strips or lacing bars to effectively manage cabling within the enclosure. Your best bet, however, is to find an enclosure with cable management built directly into the vertical mounting rails. In either case, an enclosure should provide plenty of grommeted access points (to protect cables) through the rear and top of the cabinet, as well as through the bottom for raised floor installations.
Critical accessories
In addition to the servers you're protecting, don't forget other accessories that may need to be mounted in the enclosure-network devices (hubs, routers, patch panels, KVM switches, tape drives and storage) as well as peripherals (monitors, keyboards and modems).
The most critical accessory is power protection. All servers should be protected by an uninterruptible power supply (UPS) system, available in a variety of rack-mount configurations. Some protect an entire enclosure of equipment while occupying only 1U. Even equipment that doesn't require constant uptime should be protected by surge suppressors or line conditioners, which are also available in rack-mount configurations.
Don't forget power supply accessories, such as power strips. Since you don't want dozens of power cords snaking out of your enclosure, power strips will give you a single connection point. Although 1U rack-mount models are available, power strips can be mounted on any out-of-the-way surface within the cabinet, keeping rack space free for other equipment. Remember that any accessories that are not rack-mountable will require additional trays, shelves and mounting accessories.
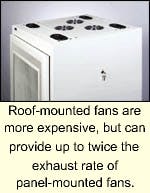
Next, add up the total BTUs of heat generated by the equipment you plan to mount. A quality 45U enclosure, with plenty of ventilation built into the top, bottom, doors and sides, will be rated to accommodate an average of 3,000 to 5,000 BTUs. If your BTU total exceeds the rating of the cabinet, you will need to purchase a roof- or panel-mounted fan. Roof-mounted fans are more expensive, but they can provide up to twice the exhaust rate. Panel-mounted fans should be mounted in the rear of the enclosure, ideally directly behind equipment generating the most BTUs.
Installation limitations
Armed with the size of the cabinet you'll need, double-check the physical limitations of your facility to make sure the rack you've chosen will fit. A solidly-constructed enclosure will weigh up to 450 lbs., so check with your loading dock for specific unloading needs, such as lift gates or hand trucks. Premium enclosures come fully-assembled with casters so that all you have to do is remove packaging on the loading dock and roll the enclosure to the desired location.
Get room dimensions and related ceiling, door and elevator heights for moving your enclosure through the facility. Also, given the diversity of your equipment, make sure that the enclosure will be placed in a location that is in close proximity to adequate power, network and telecom receptacles.
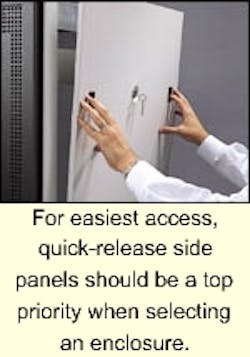
Check the swing radius for opening and closing. Standard enclosure doors open on the right and swing to the left. Some doors, however, are reversible. All doors and sides should be easily removable to simplify maintenance.
As your installation expands, you may want to link multiple enclosures side-by-side into a secure, uniform bay. While some enclosures are not expandable, or only offer expandability with optional accessories, the best models are fully expandable and include all the necessary hardware. Create a bay by removing side panels and securely bolting enclosures together.
Features at a good price
Price is always a main consideration, but one that shouldn't force you to sacrifice key features. Choose the enclosure that offers you the most premium features at the most competitive price. Expect to pay between $1,000 and $2,000 for a quality 40U-45U network enclosure. Servers and peripherals will come and go, but a premium enclosure is a durable item that will provide service for years to come. When comparing enclosures, be sure to look closely at standard features. Beware of the "extras" that will unexpectedly add up. Many manufacturers offer their enclosures à la carte, which dramatically drives up the cost once you start adding basic features. To avoid hidden costs, consider enclosures that come fully-equipped.
Finally, look beyond the enclosure to the manufacturer that stands behind it. Longevity usually indicates a proven track record. Manufacturers such as Tripp Lite (www.tripplite.com) have a department dedicated to helping you install your enclosure and mount your equipment correctly, as well as helping you with accessories years after your purchase. In addition, make sure an enclosure is backed by a lifetime warranty.
Bob Gombas is product manager for Tripp Lite, Chicago, IL. You can contact him via e-mail at: [email protected]


