Homemade jig eases Category 5 terminations
Bob Pasheilich, Michigan-Kal-Electronic Inc.
Problem
As an installer, you must terminate Category 5 cable to several kinds of modular connectors. Some connectors, particularly 110 punchdown insulation-displacement connectors, are often difficult to hold while separating the conductors to make the termination.
Solution
A homemade jig that can hold the various Category 5 connectors in place while you terminate the cable will make your installations easier.
Procedure
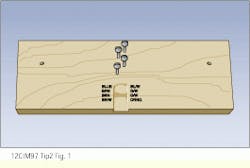
1) Using a piece of wood--a 4 x 10 x 1/2-inch piece of oak is recommended--make a jig that will fit the connectors you plan to use. The jig should include screws that serve as the channel through which the cable will run, a slot that will fit the connectors you will use, and markings on each side of the slot to indicate the positions of the wires.
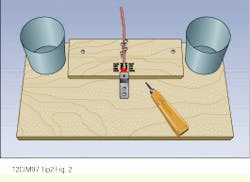
2) Mount a plastic container on the upper right corner and another in the upper left corner of a separate piece of wood, using adhesive. An 11 x 24 x 3/4-inch piece of plywood is recommended. Also, mount a bracket that will align with the slot in the jig.
3) Using two screws, mount the jig on top of the plywood, aligning the jig`s slot with the plywood`s bracket.
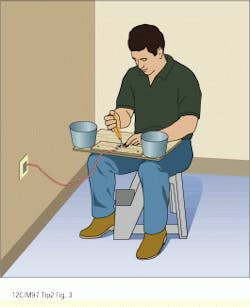
4) When you are terminating a cable, feed the cable through the channel, put the connector inside the slot in the jig, and use the markings on the sides of the slot to ensure that the wires are in their appropriate positions. Use one plastic container for the parts you will use and the other for scraps generated from your work.
Bob Pasheilich is a bicsi-certified installer with Michigan-Kal-Electronic Inc. (Kalamazoo, MI).
The homemade jig should include staggered screws that act as a channel for the cable, a slot for the connector, and markings along each side of the slot to indicate proper wire positions.
The jig should be mounted to a larger piece of plywood that contains two plastic containers and a bracket that aligns with the jig`s slot.
The apparatus fits onto an installer`s lap and lets the installer terminate cables while he is seated near an outlet.


