Silicone and clips help secure final ceiling tile
Drue R. Best III,
Matrix Integration llc
Problem
Some older buildings still have 1-square-foot acoustic ceiling tiles that are held in place with a flat metal spline between adjoining tiles. It is fairly easy to remove a group of these tiles every 15 to 20 feet to gain access to the ceiling space above to route cabling. The challenge comes, how-ever, in replacing the last tile in a group. You can easily replace all the other tiles in the group with the metal spline, but the last one is always difficult.
Solution
Once you have secured all other tiles with the flat spline, you can secure the last one or two using a tube of silicone and either paper clips or straight pins.
Procedure
1) When you`re ready to replace the ceiling tiles, make sure you have with you a tube of white or clear silicone and either some small metal paper clips or straight pins, such as those used in sewing and alterations of clothing.
2) Replace as many of the tiles as you can using the metal spline.
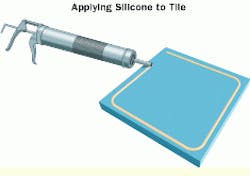
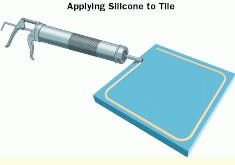
3) Carefully place a 1/4-inch bead of silicone around the edges of the remaining tile(s).
4 Lift the tile into place, ensuring it is flush with the adjacent tiles. The bead of silicone should contact all edges of the adjoining tiles.
5) Secure the tile with small paper clips or straight pins. You probably won`t need any more than four. After straightening the paper clips, carefully push them through the edges of the last tile into the edges of the adjoining tiles.
6) Check to ensure that the weight of the tile does not cause it to sag. If it does, adjust the clips or pins and install additional clips or pins for support, if necessary.
7) If you use straight pins, push them into the tile until they are flush with the tile surface and leave them permanently in place. If you use paper clips, remove them once the silicone has cured.
Take care to ensure you do not apply too much silicone to the tile`s edges.
If using straight pins, push them all the way into the tile until they are flush with its surface.
Drue R. Best III, registered communications distribution designer (rcdd), is a consultant for the structured cabling division of Matrix Integration llc (Jasper, IN), a full-service telecommunications and network-integration firm.


