6 guidelines for better IP security camera installations
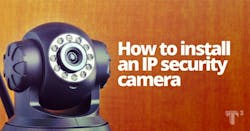
The following technical brief from T3 Innovation offers 6 key guidelines for how to install an IP security camera for video surveillance purposes.
Installing an IP security camera is a relatively easy task when working with a simple network, but it can become more complicated with a large installation. This is often when things can go wrong and unless you have access to the right tester, you may struggle to get things right. Here are 6 simple guidelines on installing an IP security camera.
See also: 5 network testing tips for beginners
1. Camera and Network Configuration
Naturally, the first task is to decide on the system configuration, including the number and make of cameras, how your video footage will be saved and the physical location of each item. One of your first considerations will be the quality of the video you want, as this will determine the type of camera used and your network speed requirements. Usually, you will also need some sort of digital recorder and one or more network switches.
2. Installation and Cabling
Connect up the devices using Cat 5 or Cat 6 cable. Take care to keep each cable shorter than 328 feet. If you need more length, a switch can act as a repeater. Unless you use standard cables, you will have to fit RJ-45 connectors to the cables, so make sure you get the connections right and be careful not to damage the cable. Connect the IP camera to the switch and in turn connect the switch to your Internet router and the recorder.
3. Power for the Camera
The camera needs a power supply, and the easiest method is power over Ethernet (PoE) to supply power through the Cat 5 cable. To do this you need either a PoE enabled switch or a PoE power supply. Make sure the camera is PoE enabled. If you are using a PoE power supply, then it should be placed between the switch and the camera unless the switch is POE enabled. Alternatively, a rack-mounted PoE Midspan device is ideal for powering several cameras.
4. Setup
In order to setup the system you will need the MAC address of each IP camera as well as its IP address. In most cases, the IP address is not static, and depending upon the system, it may be necessary to set the IP address to a static one. Normally, you would start the setup with the recorder and configure this according to the manufacturer's instructions, and once this is complete, configure each IP camera in turn. The actual set up differs for each manufacturer but it is usually normally quite simple.
5. Resolving Problems
In practice, several things may go wrong. Any wiring issues or incorrect RJ-45 connections may make it impossible to communicate, as will an incorrect MAC address. Additionally, if the Cat 5/Cat 6 cables are too long, you might find that the PoE voltage is too low by the time it reaches the camera. Each of these issues can be rectified by painstakingly working through the system, but this may take a considerable time in a complex system. A more effective approach is to use a specialized digital network tester.
6. Digital Network Testers
T3 Innovation manufactures a comprehensive range of digital cable testers. These testers can be used to identify cable faults, such as open circuits, shorts or incorrectly wired RJ-45 connectors, and also for work on coaxial cables. One such device is the Cable Prowler, which identifies cable faults and measures PoE voltages as well as identify the cable locations on a hub, switch or router. Other devices, like the Net Prowler can ping and discover IP and MAC addresses, detect VLAN configuration, plus perform numerous other tests. T3's NetChaser also measures the transmission speed of the cable and traces its route from the camera to the router.
Source:Utility Products